How to match and sew prints
Supplies
(Click fabrics for direct links for purchase at Warehouse Fabrics Inc.)
The calculations
| We’re going to have to start with a little math so you can figure out how much fabric you need. Projects where you’d need to match prints would include curtains, tablecloths and duvets. In this example, I’m making a tablecloth. My table’s dimensions are 40″x80″. I also need to calculate the “drop” of the tablecloth, which is how far off the edge of the table it hangs. My drop is 11.5″ plus seam allowance. You need to multiply the drop by two — one on each side. Same for seam allowance (1/2″ times two).40+23″ drop+1″ hem = 64″ wide 80+23″ drop+1″ hem = 104″ long So to figure out the length of fabric I need, I need to divide 104″ by 36″ = 2.8 yards. Round up to 3. But here’s the thing: The width of the fabric is about 56″. I need it to be 64″, so I am going to have to piece together two widths.Here’s what you CAN’T do:
A = length of main panel A+B= length of second piece of fabric, to be used as side panels. (You may need more than one additional length, depending on the width of your fabric and your horizontal repeats.) In my case it’s 104″+26.5″=130.5″ (round to 131″, or 3.6 yards for the extra panels.) I’m going to cut this in half lengthwise to form two side panels. This will be wide enough for my purposes, but if you need even more width, you might need yet another length of fabric. Possibly a full width on either side of the main panel. So determine that for your project, and keep in mind the horizontal repeat. Your patterns aren’t going to line up right on the edge of each fabric. You’ll have to come in a little on each panel till you find a match, so some of each will be wasted. The first cut of fabric is simply the length of your project (104″) If you needed three widths of fabric, you’ll add the A+B calculation again, and so on. Does that make sense? |
The process
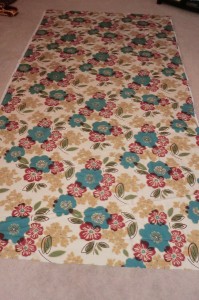 |
First, prewash and dry your fabric. At this point, don’t fret about ironing it, unless it’s so wrinkled it doesn’t lay flat. Next, cut your “wide” piece of fabric. This will be the center piece. You never want to just sew two pieces together down the middle. It looks much better if there’s a wider center piece and then extra widths added on either side. So my center piece (labeled “wide” on the photos throughout this tutorial) is the width of the fabric, or about 54″. I didn’t mess with trimming the selvages. Just cut it to the length of whatever you’re making. I’m making a tablecloth and cut it to 104″ long. See this tutorial for a tip on easily cutting long stretches of fabric. |
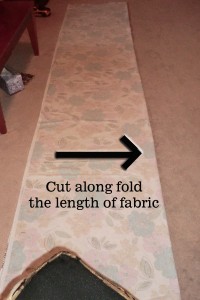 |
After cutting your wide, center piece, take the rest of your length of fabric (do not cut the length at all yet. You’ll see why) and fold it in half lengthwise. Cut along the fold so you have two long pieces that are 1/2 of the original width of the fabric. |
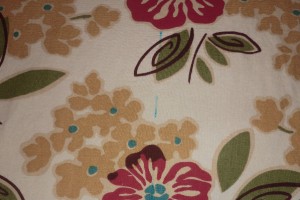 |
Because I’m making a tablecloth, I decided to make it so the seams where I join the fabric fall on the edge of the table. I just thought that would look nicer than having them fall on top of the table somewhere. So I decided I wanted my center piece to be 40″, or the width of my table. So I measured the mid-point of my center piece and marked a dotted line all the way up. |
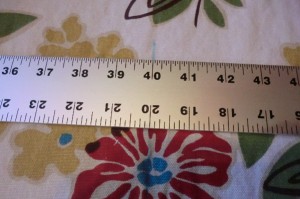 |
Then, as I work my way down, I line up my ruler up so that the 20″ point (bottom edge of ruler) was on that center line. That gave me 20″ on either side of the dotted line and I would know where I wanted my fabrics to join up as I worked down the fabric. |
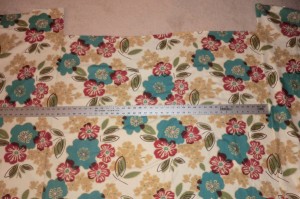 |
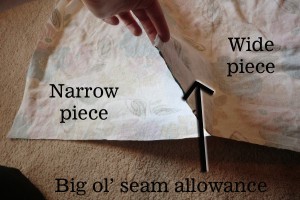
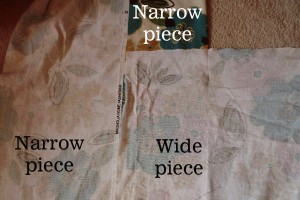
Here’s a wider shot of that. You can see the narrower fabric pieces on either side, and they are extending past the edge of the center, wide piece of fabric. That extra length is necessary so you can shift the side panels up and down in order to match the prints. Leave the extra length alone for now. This photo kind of gets ahead of itself in terms of starting to match up the fabrics. Keep on reading. |
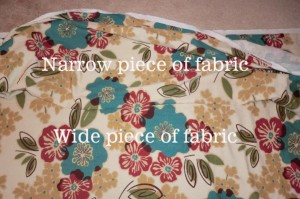 |
Here, I’ve shifted my view so I’m looking at the narrow piece of fabric on the top of the photo and the wide, center piece underneath. You can see how I’ve folded the narrow piece of fabric under itself until I found a place where the patterns on the two pieces match up. So this fold here would line up with the ruler 20″ from the center markings I made above. (See the photo above this one.) |
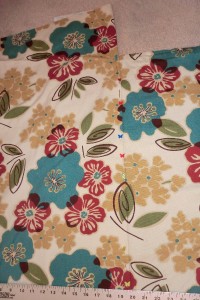 |
Begin pinning the layers together very carefully, starting at one end. This is going to be confusing, but the situation here is that the part under the narrow side pieces is actually three layers thick. I tried to photograph this below, but it’s hard to do. Basically, you’ve got the edge of the wide, center piece and then the narrow, side piece is folded back on itself, so it’s two layers plus one layer thick. |
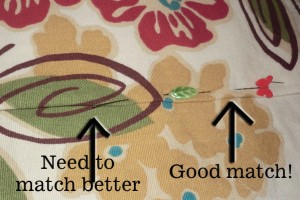 |
Here is a closeup as I go. I started at the right and am working toward the left, so as I go, I need to make that portion match up better. Use TONS of pins so that nothing can shift. |
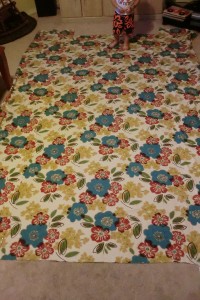 |
Do this all the way down both sides so that the center piece is an even width all the way down (in my case 40″). This picture: 1.4 million pins + curious toddler = miracle that he didn’t get stabbed. |
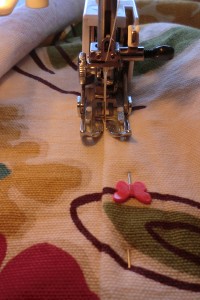 |
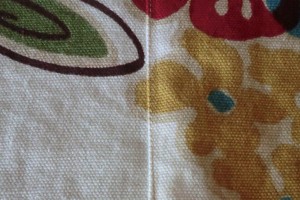
Now it’s time to sew. You really have to watch out for all the pins in this as you move it around. I stabbed myself a lot. So, to sew it, you’re actually going to sew on the TOP, RIGHT SIDE of the fabric, through all three layers mentioned above. Sew as close as possible to the fold. I mean, get right on top of it without going off of it. This means sewing VERY slowly. I’m not a slow sewer, so this drove me crazy for 104″ on each side. |
 |
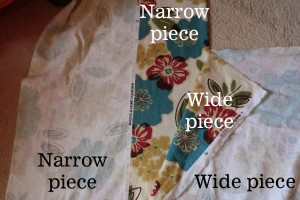 |
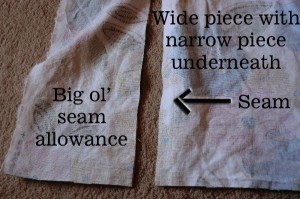
| I’ve flipped the sewn cloth over to try to explain the different layers that are going on. I hope this helps. | |

