Diaper bag with a divider
 |
I’m pregnant, and I recently bought a fancy-pants designer diaper bag that’s compact and looks like a purse. But, really, who am I trying to kid? I could maybe fit the contents of my purse in there, but with baby stuff, too? No way. I mean, every day when I walk into work I have a tote bag, a purse and a lunch cooler that looks like a purse (and they are all in different patterns, so I look like some sort of mismatched hobo). Add a baby’s needs to this, and I had to get serious and accept the fact that I’m going to need something bigger. Much bigger. |
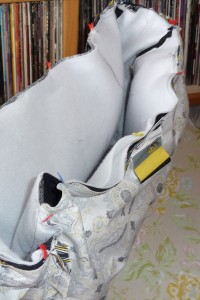
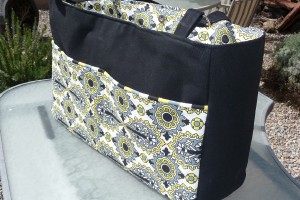
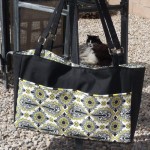
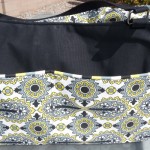
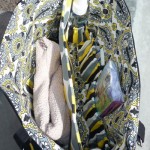
| I set off on a quest to make the most useful diaper bag I could. I had made some for friends before, but I really wanted a center divider. You can carry your stuff and baby’s stuff, all in one bag. It’s a biggun, measuring about 19″ long, 12″ tall and 6″ wide.I completely redesigned and came up with this one. I’ll admit, I was winging it and wondered if somewhere I’d realize I’d made some fatal miscalculation on how it would all come together. But guess what? It came together perfectly. Now I’m going to walk you through the same project.What’s exciting about this bag? It’s full of useful surprises! It’s got a divider inside and lots of pockets, including some with elastic that pull out, which are great for bottles.
ETA: This is a complicated bag; some beginners have felt that this bag is a little tough. I am always happy to answer your questions — just leave a post in the comments at the bottom and I’ll reply there. You can search our blog for other, simpler bag tutorials if you’d like something more basic. Please note, in regard to questions, that I’m always happy to answer them but that I did this project in 2010. Share your bag!NOTE: This is one of our more popular projects. If you make it, please share pictures with us on our Flickr page! Also, submit anything made with fabrics from Warehouse Fabrics Inc. to our gallery page. Simply click “Add Photo to Gallery” just above the pictures. Adding a zipperNOTE #2: Many have asked about adding a zipper to this bag. I eventually did another bag tutorial with a recessed zipper. If you’d like to add a zipper to this bag, I’d recommend that method. Please visit this post. |
|
Supplies
(Click fabrics for direct links for purchase at Warehouse Fabrics Inc.)
The pattern
| I didn’t make a downloadable pattern this time because all of the pieces are rectangles. Just draw pieces to these dimensions. (Yep. There’s a lot of cutting!) (numbers are width x height, in case you are using a directional print)Bag front/back, exterior and interior:20″x13″cut 2 main fabric (in my case, black) cut 2 lining fabric #1cut 2 fusible fleececut 2 interfacing (I used Craft Fuse)Bag sides, exterior:7″x13″
cut 2 main fabric cut 2 fusible fleece cut 2 interfacing (I used Craft Fuse) Bag bottom, exterior: 20″x7″ cut 1 main fabric cut 1 fusible fleece cut 1 interfacing (I used Craft Fuse) Bag sides, interior: 4″x13″ cut 4 lining fabric #1 Bag bottom, interior: 20″x4″ cut 2 lining fabric #1 Divider, interior: 20″x10.5″ cut 2 lining fabric #2 cut 2 interfacing Exterior pockets: 20″x8.5″ cut 4 lining fabric #1 Straight pocket, interior: 20″x6″ cut 2 lining fabric #3 Long elastic pocket, interior: 28″x6″ cut 2 lining fabric #3 Side elastic pockets, interior: 6.5″x6″ cut 4 lining fabric #3 Straps (makes 2): 4″x30″ cut 2 main fabric Strap tabs (makes 4): 4″x5″ cut 4 main fabric Piping 1.5″x 21″ cut 3 lining fabric #3 Note: There is a piping tutorial here, but in this particular case I did not cut on the bias. I just cut along the grain line. I don’t need my piping to hug any curves in this particular case, so non-bias piping is fine. 1/2″ seam allowances throughout |
The process
 |
 |
|
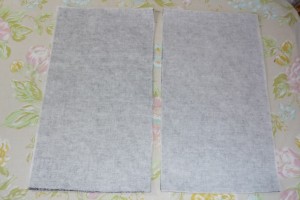
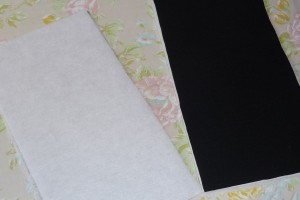
| Fuse interfacing to the two exterior side and front pieces, plus the exterior bottom (left). Not all pieces are shown here. Then fuse fleece on top of the interfacing (right). In my example, all of my exterior pieces are solid black. So, each piece of the exterior bag is fabric plus interfacing plus fleece. | ||
 |
 |
|
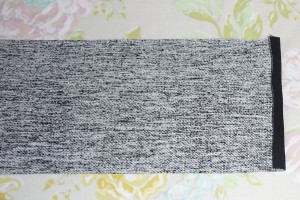
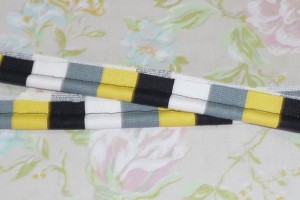
| You’ll make two straps according to the directions in the Non-Turn Strap Tutorial, but first press under a quarter-inch on each end so you have no raw edges when all is said and done (left). Then make three 22″ pieces of piping according to the Piping Tutorial. Please note that unlike in the tutorial, I did not cut these strips on the bias. It really wasn’t necessary since I’m not going to be hugging any curves (right). | ||
 |
 |
|
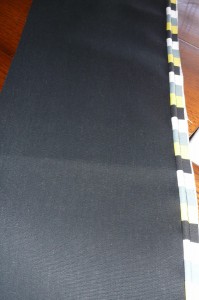
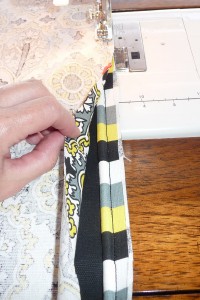
| NOTE: In this photo above, you are looking at my pocket pieces for the exterior. I have used a piece of solid black for one side and a piece of the print for the other. With raw edges together, sew the piping to one long edge of an outer pocket piece (left). You want the piping to end up 1/2″ away from the raw edge. Sew the other outer pocket piece over that, sandwiching the piping in between (right). This is much easier with a piping foot, but you can also use a zipper foot. Just try to get as close to the piping as possible. | ||
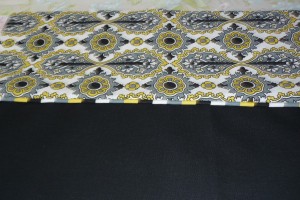 |
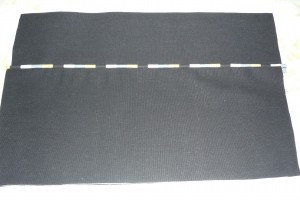
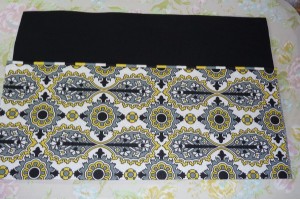
I’ve opened up my piping sandwich, and this is what I have. Now press so that the wrong sides of those fabrics are together and the piping is at the top. You can see that one side of my pocket is black, one is the print. | |
 |
 |
|
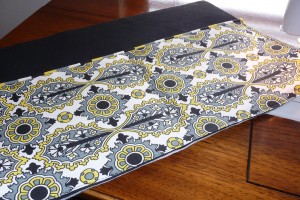
| In these photos, I’ve laid my outer pockets on top of my other front pieces. In one photo I have the black side of the pocket showing, in the other I have the printed side. I am trying to decide which I want to have facing out. You see, I have a tendency to make lots of bags with bold prints, but then I spend a lot of time lamenting the fact that I don’t have a solid black purse or bag. So I promised myself that for this bag, the exterior would be primarily black. The fun would be on the inside, right? The pocket piping would give you a hint of the exciting stuff in the interior. I was going to arrange the outer pockets as in the photo on the left. Except then the prints got to me. WHAT DO I DO!?! Well, if you knew me at all, you wouldn’t even be asking that question. |
||
 |
So the print won. And I’m sure glad it did. I’m telling you, the bag is so much cuter this way! In this picture, I’ve basted the pocket onto the front piece by sewing along the sides and bottom ONLY. I’ve also sewn a line down the center of the pocket through all layers of the pocket and exterior bag piece to create two pockets of equal size. | |
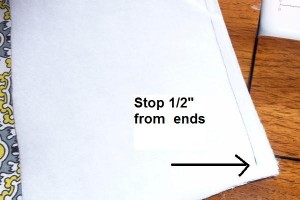 |
Now sew the exterior bottom piece to the side pieces. In this picture, the white is the back side of the bottom piece. I’ve sewn through the bottom, the pocket and the main bag piece. Stop about 1/2″ from each end to leave room for other seams in a few minutes. | |
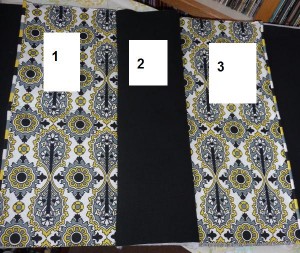 |
This is the exterior bag, laid flat, without the sides. #1 is the exterior front with pocket, #2 is the bottom of the bag and #3 is the exterior back with pocket (of course, front and back are the same in this case). | |
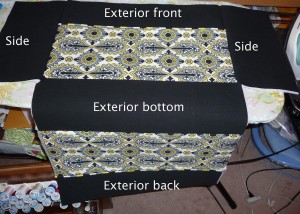 |
This is the bag laid flat. I hope the labeling helps you understand what you’re viewing. I’ve attached the exterior sides to the front panel. The tops of the pieces should line up exactly. Due to seam allowances, the sides will extend past the bottom of the front piece. This will give you seam allowance for sewing it to the bottom piece in a minute. | |
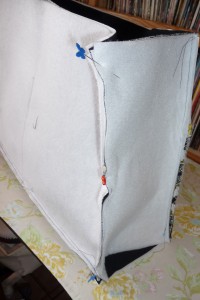 |
But before you sew the bottom piece to the side piece, sew the other side of the side piece to the back piece. Did that make any sense!? Now you’ve got a nice box, and the only thing that’s open is the top and the two side pieces where they meet the base of the bag. | |
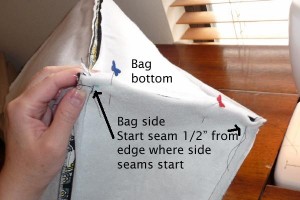 |
Now you’ll sew that bottom seam where the base of the bag and the sides of the bag come together. It can get bulky, but try to sew from one existing side seam to the next. If you go from raw edge to raw edge, you won’t get as nice of corners. | |
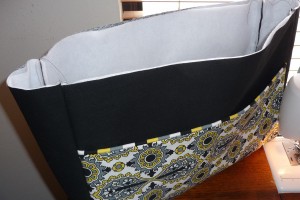 |
Turn your bag right-side out, and your exterior is done, except for straps! Admire for a few minutes, patting yourself on the back for choosing the printed side of the pockets. Good choice! So what if you’ll clash with practically everything you wear? | |
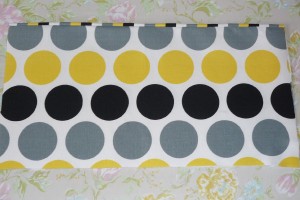 |
Alright, that’s enough. Back to work. It’s time for the interior. We’ll start with the divider. Apply fusible interfacing to each divider piece. Sew the piping on and sew the pieces together just like you did for the exterior pocket. The sides and bottom will remain raw edges. | |
 |
 |
|
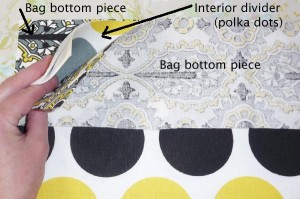
| Because of the divider, instead of having one bag bottom piece like on the exterior, we’ll have two, one on each side of the divider. Sandwich the bottom (raw) edge of the divider between the two interior bottom pieces and sew. Press open. Now your only raw edges on the divider are along the sides. | ||
 |
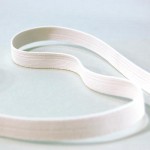
Next up is the elastic pocket. I wanted pockets that could hold fairly large objects, like bottles, securely. Right sides together, place the long elastic pocket pieces together and sew a 1/2″ seam allowance along one long end. Turn right-side out and press. | |
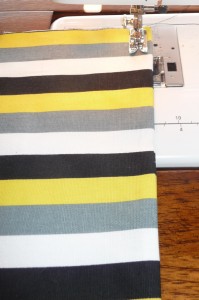 |
Sew a casing for the elastic. I sewed mine about 1/2″ away from the finished edge. | |
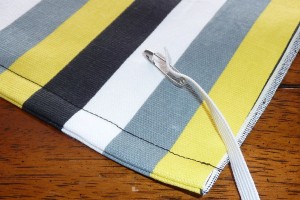 |
using a safety pin, thread the elastic through the casing. | |
 |
 |
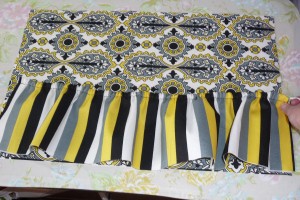 |
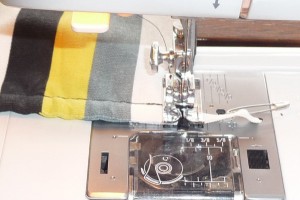
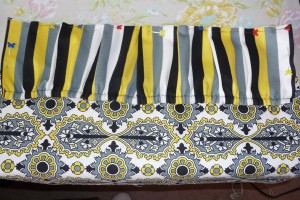
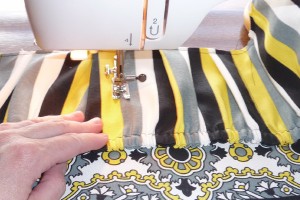
| You’ll gather it up some (left), then secure one end with some stitches (center). Gather from the free end until the elastic part is the same width as the interior front panel (right). Then secure the other side of the elastic with stitches. | ||
 |
 |
|
| The bottom of the elastic pocket is still much bigger than the interior front panel. So what do you do? There are two options. One is to make little folds, like pleats, and just sew it down (left). The other I’ll show a few steps below. After basting the raw edges of the pocket to the interior front panel, make a few divider pockets so that it’s not just one huge, long pocket (right). | ||
 |
 |
|
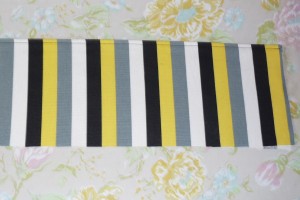
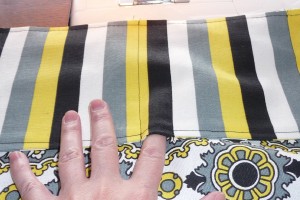
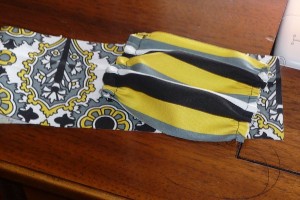
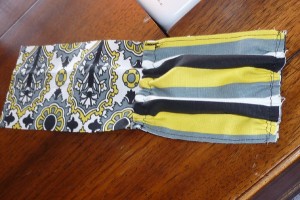
| Now we’ll make the nonelastic pocket for the other side of the interior. Place these pocket pieces right side together and sew along one long edge. Turn and press. Then top-stitch a little ways from the finished edge (left). Pin to the bottom edge of the interior back (again, it’s the same as the “front” but I’m just trying to differentiate the pieces) and baste around the raw edges. Stitch some dividing lines in. I like to make one that’s about the size of a pen, which I’m demonstrating with my finger, as a real pen would have required me to reach about 18 inches. | ||
 |
 |
|
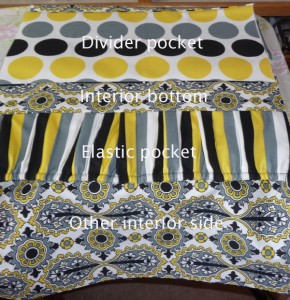
| OK, back to the side with the elastic pockets: On this side (what I’ve referred to as the “front”), the interior sides of the bag will have elastic pockets, too. On the other side, I did not add pockets to the sides of the bag. Do these little pockets the same way you did the big one. Here, I’ve demonstrated an alternative way to deal with the bottom of the pocket. Instead of pleating it roughly, I’ve sewn gathering stitches and gathered it (left). Baste it in place (right). | ||
 |
 |
|
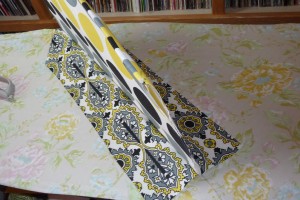
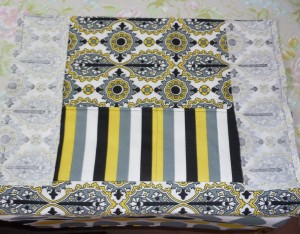
| Sew your front and back pieces to the bottom pieces. The pictures may be confusing, but it’s really just the bag laid flat. At left, I’m showing you the “interior back,” with the dividing pocket (dots) flipped the other way. At right, I’m showing you the “interior front” with the divider (dots) flipped up. So in the right photo, the divider is covering the nonelastic pockets. Confused? | ||
 |
 |
|
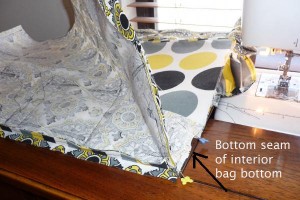
| What? You’re still here? Congratulations for sticking with me! Thanks for making all of this work on my part worthwhile! Now, let’s sew the sides of the interior in. Sew the pocketless side pieces to the sides of the “interior back.” Remember what I said above about lining up the edges of the tops of the pieces and that you’ll have a bit of hangover at the bottom (left). PLEASE NOTE: on one of these edges, leave a large section unstitched for turning later (back stitch at each edge of this hole for reinforcement later). In the left-hand picture, I’ve left the left side seam mostly open. That was a lot of “lefts” in one sentence.Do the same for the elastic pocket side, but don’t leave a seam open (right). | ||
 |
 |
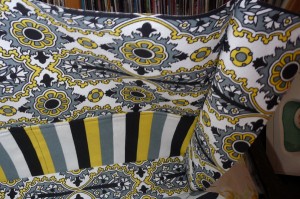 |
| Now sew the bottom pieces to the side pieces. You still haven’t connected the side pieces to the interior divider. This is a different order than how we did the exterior, but just go with me here. Stop at the seam line, so you have about 1/2″ unsewn (center). This is what it will look like (right). That edge on the right will connect with the interior divider in a minute. | ||
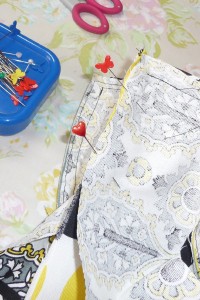 |
On either side, sandwich the interior divider between the raw edges of the side pieces, right sides together. |
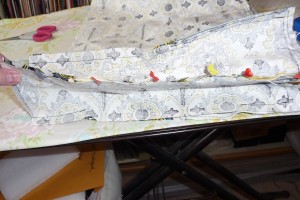 |
Sew. |
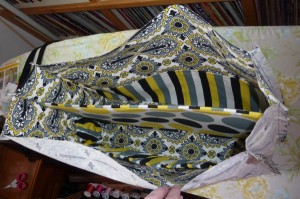 |
It worked! I was getting kind of nervous at this point that something wasn’t going to work out for me here. But it did. I am exuding so much confidence with this tutorial that I’m sure you never even noticed I was winging this, right? I mean, other than the fact that I keep pointing that out. |
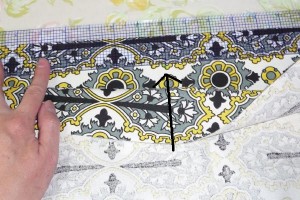 |
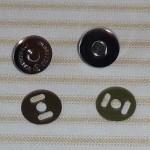
Attach the magnetic snaps using the Magnetic Snap Tutorial. Mark a dot halfway across the interior front and back pieces and 1-1/4″ down from the raw top edge. |
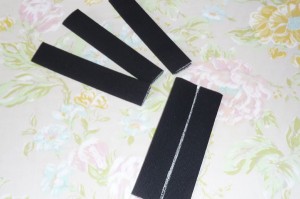 |
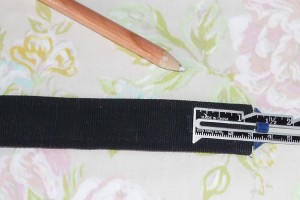
Make four strap tab pieces in the same manner you made the straps themselves, only you don’t need to worry about raw edges. The three pieces at the top are finished. The one at the bottom shows you how the raw edges are brought to the center, then you fold that in half and press. |
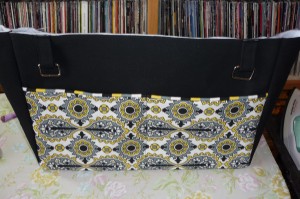 |
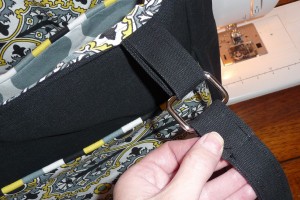
Decide how far in from each edge you want your straps and mark. Fold each tab in half and slide a square ring into the fold. Sew the tabs onto the exterior of the bag with raw edges together and rings hanging down. Sew within the 1/2″ seam allowance so you don’t see this stitching later. |
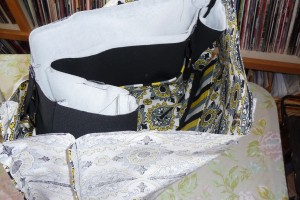 |
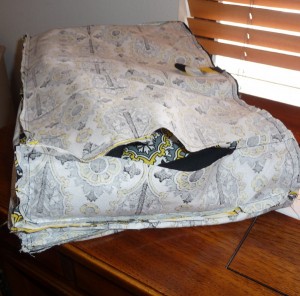
With the exterior of the bag right-side out and the interior inside out, slide the exterior inside the interior on the side with the open edge. |
Other views
(Click for bigger views)
 |
 |
 |
 |
 |
 |


